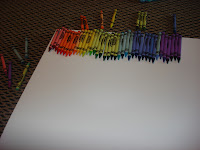
Hey Everyone! Today I thought I’d give you all an arts and crafts tutorial– how to make melted crayon art. I made one for my apartment bedroom a few months ago and I recently made one for a friend’s graduation gift. I’ve been asked for help by a lot of people with making them, so I thought I’d share it with you guy too. So let’s get started! And if you make one, let me know how it turns out, and tweet me a picture of it!
Materials:
·
Crayons
·
Canvas
·
Hot Glue Gun/Glue
·
Hairdryer
*When determining how
many number of crayons needed, consider the size of the canvas and the specific
colors desired. Overall, it is a bit of
a guessing game.
Instructions
1.
Once you determine
which colors you would like to use, line the crayons up in order of desired
look on canvas. (this may require you to
add or remove crayons)
2.
Now that the
crayons are lined up in the desired order, use the hot glue gun to give the
crayons to the canvas. (I recommend
starting from the middle and working your way to the sides)
*A little tip for the gluing- put the glue
on the canvas and place the crayons down on the glue.
3.
Once the glue is
dry, take the canvas outside or place on newspaper to protect from
splattering.
4.
Use a hairdryer to
melt the crayons, letting the wax drip down the canvas. It may take a minute or so for the wax to
begin to melt, but be patient, it will start flowing rapidly once it
starts. You can use the hairdryer to
control the direction of the flow of the wax and the thickness of the way the
wax hardens on the canvas.
The rest is up to you! The great part of this art is that it is so
customizable for each person. You can
use the hairdryer to get the desired look that you would like to achieve, and
even once the wax has hardened, adjustments can be made if you heat up the wax
again.


You forgot to put a warning that for those who are indecisive, the process of ordering crayons may take longer than necessary!
ReplyDelete