Showing posts with label DIY. Show all posts

Wednesday, June 4, 2014

Preserving the Past: A Craft for the Home

As a former dancer, I have acquired a closet full of old dance costumes that I just can’t seem to part with.  If you were a dancer, you probably know what I mean.  I danced for 12 years of my life, and with that came multiple pairs of dancing shoes a year, leotards, tights, skirts, shorts, and the infamous recital costumes. 

But what is really the point in keeping all of these costumes?  It’s not like I can ever fit into the tutu that I wore in the first grade again. I was 6 years old.  Plus, it’s bright yellow with multi-colored polka dots.  Not exactly something I’d want to wear on a dinner date.  But nonetheless, in the closet it hangs.

If you follow me on Pinterest, you may have seen one of my recent pins that has inspired this post, and has finally given me the answer to this question (not that I was that concerned with the fate of my cherished items, but when my parents asked about them, I never truly had an answer for them).

I’ve always had a very clear image in my head of what I want in “my adult house” when I grow up and have that kind of money, especially in my own personal office.  But now, I have this new addition.  I want to showcase this important part of my life.  After all, why shouldn’t I? 


If you have a little girl (or even a big girl) that’s a dancer in your life, or know of a dancer, please show them this idea.  Costumes can be an emotional attachment and this is the perfect way to display hard work and dedication!

Until Next Time, Happy Reading,

Allison

Sunday, May 25, 2014

Memorial Day and Summer Fun Ideas

Memorial Day is tomorrow in the States, and Summer is right around the corner.  Today I thought I’d share some great ideas I’ve found recently on how to spice up the upcoming holiday and months!  Enjoy!  And if you try these ideas out Tweet me pics or tag me on Instagram!

MissGlamorazzi’s “Beach Party Makeup, Yummy Treats + DIY Décor!”

“Fourth of July Lemon Bars”

“Memorial Day Craft Ideas”

“DIY Color Run”

“100 Fun Things to Do in the Summer- Geared for Older Kids”

“Cool Summer Apps Ideas for Kids”


I hope these ideas help you all out in having an awesome summer!  Let me know if you want more summer tips and links in the upcoming months!

Until Next Time, Happy Reading!
Allison


Friday, January 17, 2014

DIY Tile Coasters

I’ve been in a crafty mood lately.  First I made some mugs with a friend from MissGlamorrazi’s mug tutorial that was in DIYDecember, and then a few days later, I made these adorable tile coasters with Brittany.  I found this tutorial on Pinterest months ago and added it to my craft board, and finally got the chance to do it, and it was a blast!  I highly recommend trying it out.  It’s definitely one of those art projects that you can do if like me, you’re not an artsy person, but like to try out craft-y things.

*This tutorial is courtesy of thecottagemama.com


Supplies
Square tiles from a hardware store (4.25” x 4.25”)
Pieces of scrapbook paper (3.75” x 3.75”)
Pieces of felt (3.75” x 3.75”)
Mod Podge
Sponge Brush
Glue (Fabri-tac or other strong adhesive)
Clear acrylic sealer

1.     Gather your supplies.
2.     Brush one coat of Mod Podge onto tile.
3.     Place on piece of paper on center of tile.  Allow to dry.
4.     Brush on another coat of mod podge on top of paper.  Allow to dry 15  minutes, and repeat 2-3 more times.
5.     After mod podge is dry, take tiles outside and spray with clear acrylic sealer.  Follow manufacturers instructions.  (The sealer makes coasters water-resistant)
6.     Once coasters are dry completely, glue felt squares to the bottom center of the tile.


Overall, I love the way the coasters turned out.  I think they are super adorable and will definitely add a personalized girly touch to my future apartment.

Just a few tips with the coasters once they’re completely finished (based on my experience so far with them):

1.     Try to avoid hot drinks.  I had a cup of hot tea that tried to stick to the coaster after less than five minutes.
2.     Don’t leave an ice cream bowl on it overnight.  Again, a sticking problem occurred for me and this was a week after I made them, so they were completely dry. 

*All in all, avoid extreme temperatures on the coasters.  I’m pretty sure it causes the sealant to loosen of become tacky again and causes problems- potentially ruining not only your creation, but also your glass or dish.


To see the original post on the Cottage Mama, follow the link below:


I hope you all enjoyed this little DIY!  Let me know in the comments below if you like this sort of blog post, and if you’d like to see more DIY type posts!  I’d love your feedback!

Until next time, Happy Reading!

Allison

Tuesday, October 29, 2013

Household Tip: How to Clean an Eyelash Curler

For all of you ladies out there, we’ve all been there- having an eyelash curler that is so full of makeup buildup it’s disgusting.  But have no fear!  There is now no need to rush out and buy a new curler just because your old one is dirty!  In just a few minutes, you can have an eyelash curler that looks brand-spanking new!


All you need is your eyelash curler, a hairdryer, and a tissue or cloth (I recommend a tissue).


1.     Using your hairdryer, heat/blow hot air on the built-up makeup on your eyelash curler.  This should take no more than 30 seconds.  I like using the low setting for this.

2.     Take your tissue/cloth and wipe the makeup away!  The makeup should be easy to remove.  Don’t forget to clean the black rubber piece!

3.     If the makeup did not come all the way off the first time, simply reheat and wipe again.


And there you have it- a simple at home DIY that takes less than 5 minutes!  Having a clean eyelash curler can do wonders.  Not only does it make you feel like you have a brand new product/took in your collection, but it also helps your lashes curl nicer and that curl will hold better throughout the day.  All around a winning situation.


I hope you all enjoyed this little DIY and that it benefits you all.  Please share this tip with your family and friends if you enjoyed it!  And be sure to let me know if there are any other DIYs that you would like to see in the future or if you have any other post requests in the comments below!

Happy Reading,

Allison

Monday, May 21, 2012

How To: Melted Crayon Art


Hey Everyone!  Today I thought I’d give you all an arts and crafts tutorial– how to make melted crayon art.  I made one for my apartment bedroom a few months ago and I recently made one for a friend’s graduation gift.  I’ve been asked for help by a lot of people with making them, so I thought I’d share it with you guy too.  So let’s get started!  And if you make one, let me know how it turns out, and tweet me a picture of it!

Materials:
·         Crayons
·         Canvas
·         Hot Glue Gun/Glue
·         Hairdryer

*When determining how many number of crayons needed, consider the size of the canvas and the specific colors desired.  Overall, it is a bit of a guessing game.

Instructions

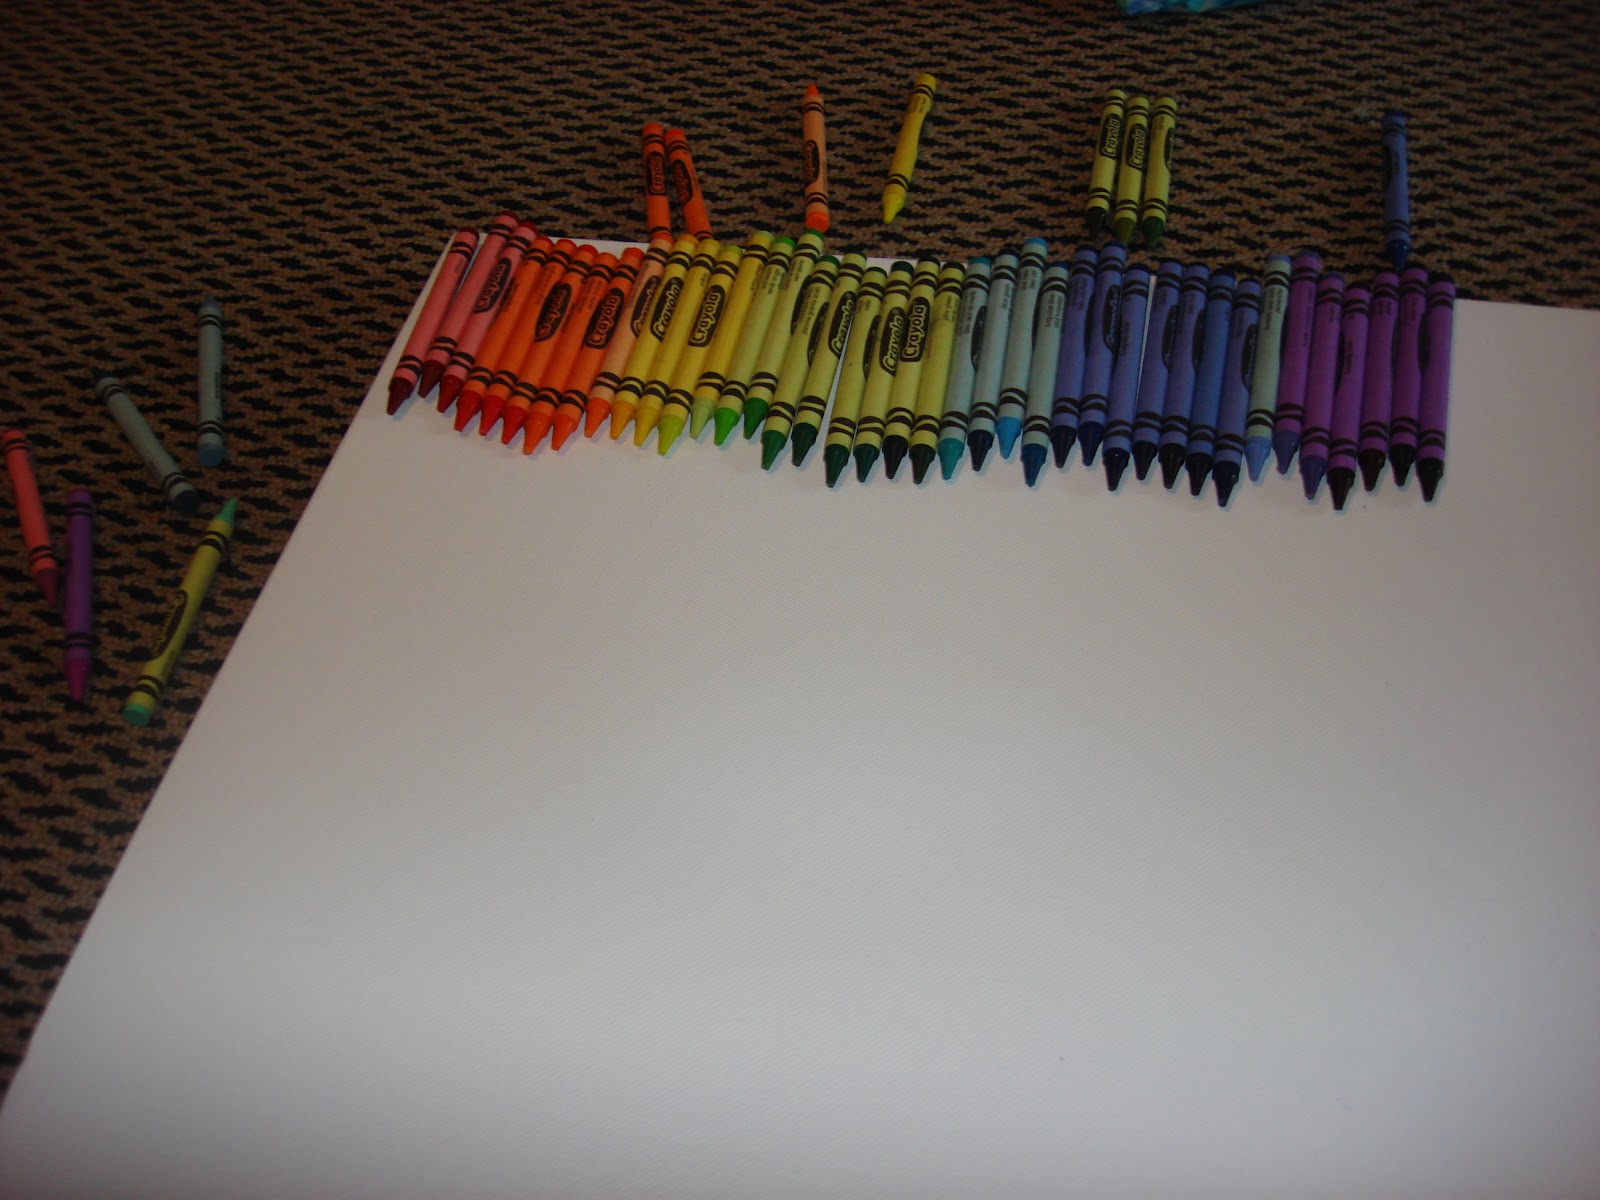
1.    Once you determine which colors you would like to use, line the crayons up in order of desired look on canvas.  (this may require you to add or remove crayons)


2.    Now that the crayons are lined up in the desired order, use the hot glue gun to give the crayons to the canvas.  (I recommend starting from the middle and working your way to the sides)
*A little tip for the gluing- put the glue on the canvas and place the crayons down on the glue.

3.    Once the glue is dry, take the canvas outside or place on newspaper to protect from splattering. 


4.    Use a hairdryer to melt the crayons, letting the wax drip down the canvas.  It may take a minute or so for the wax to begin to melt, but be patient, it will start flowing rapidly once it starts.  You can use the hairdryer to control the direction of the flow of the wax and the thickness of the way the wax hardens on the canvas. 


The rest is up to you!  The great part of this art is that it is so customizable for each person.  You can use the hairdryer to get the desired look that you would like to achieve, and even once the wax has hardened, adjustments can be made if you heat up the wax again.